Hooded Dress!
Also: the symmetry of patch pockets

Well it’s been a minute since I’ve contributed to this blog. I’ve been pretty busy! Since my last post, I digitized two new patterns. One was for a wrap top from 1923, which I finished at the end of January. That was a pretty straightforward pattern, and I have been too busy to really write about it—but really, there wasn’t much to say about it, it was a very straightforward sew. Once I re-wrote the instructions, I realized it was a great pattern for beginners. The vintage instructions were a little convoluted and brief—which made it seem like it might be difficult to sew, but it really wasn’t.
The other pattern, which I just finished, is for a hooded dress or beach coat from the early 1940’s.
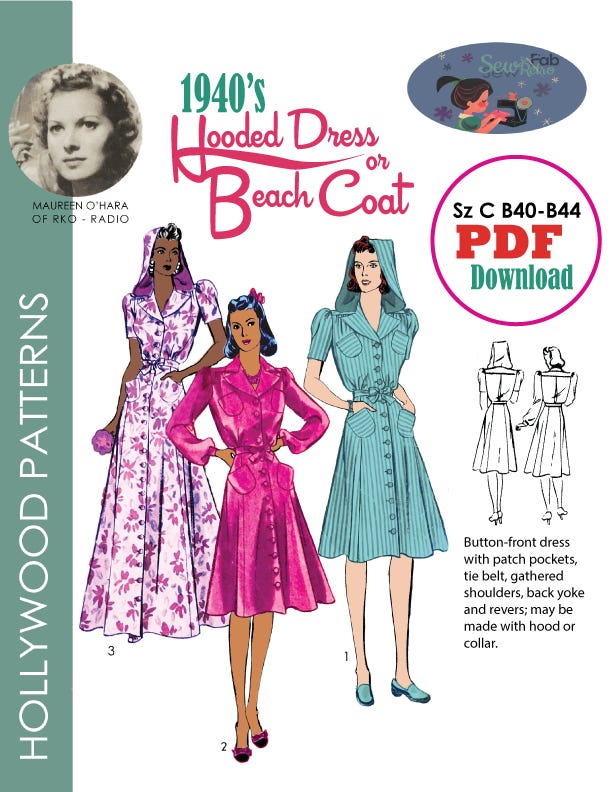
Typically when I sew from a pattern older than the 1960s, I hit some kind of weird obstacle or extremely confusing section of instructions; the hooded dress might have honestly been the easiest and least weird pre-60’s pattern I have ever encountered, with the wrap top being a close contender for that title.
Vintage pattern instructions were usually very sparse compared to modern patterns. A lot of things were taken for granted by the manufacturer, assuming that anyone who knew how to sew would automatically know to do certain things, and so…those things were not mentioned anywhere in the instructions. This is sometimes intimidating for modern sewists, especially for beginners.
In addition to being sparse, Hollywood patterns in particular were often…well, weird; at least in my experience. They were also often really cute designs, so I tend to snap them up when I can get them, but I have encountered more than a few of them with instructions that just plain did not make sense. I suspect this is in part because—in the 1940’s patterns in particular—the manufacturer tried to cram all the instructions on one single page, which was only about 11 x 14 inches. So sometimes, things got skimmed over, or skipped entirely.
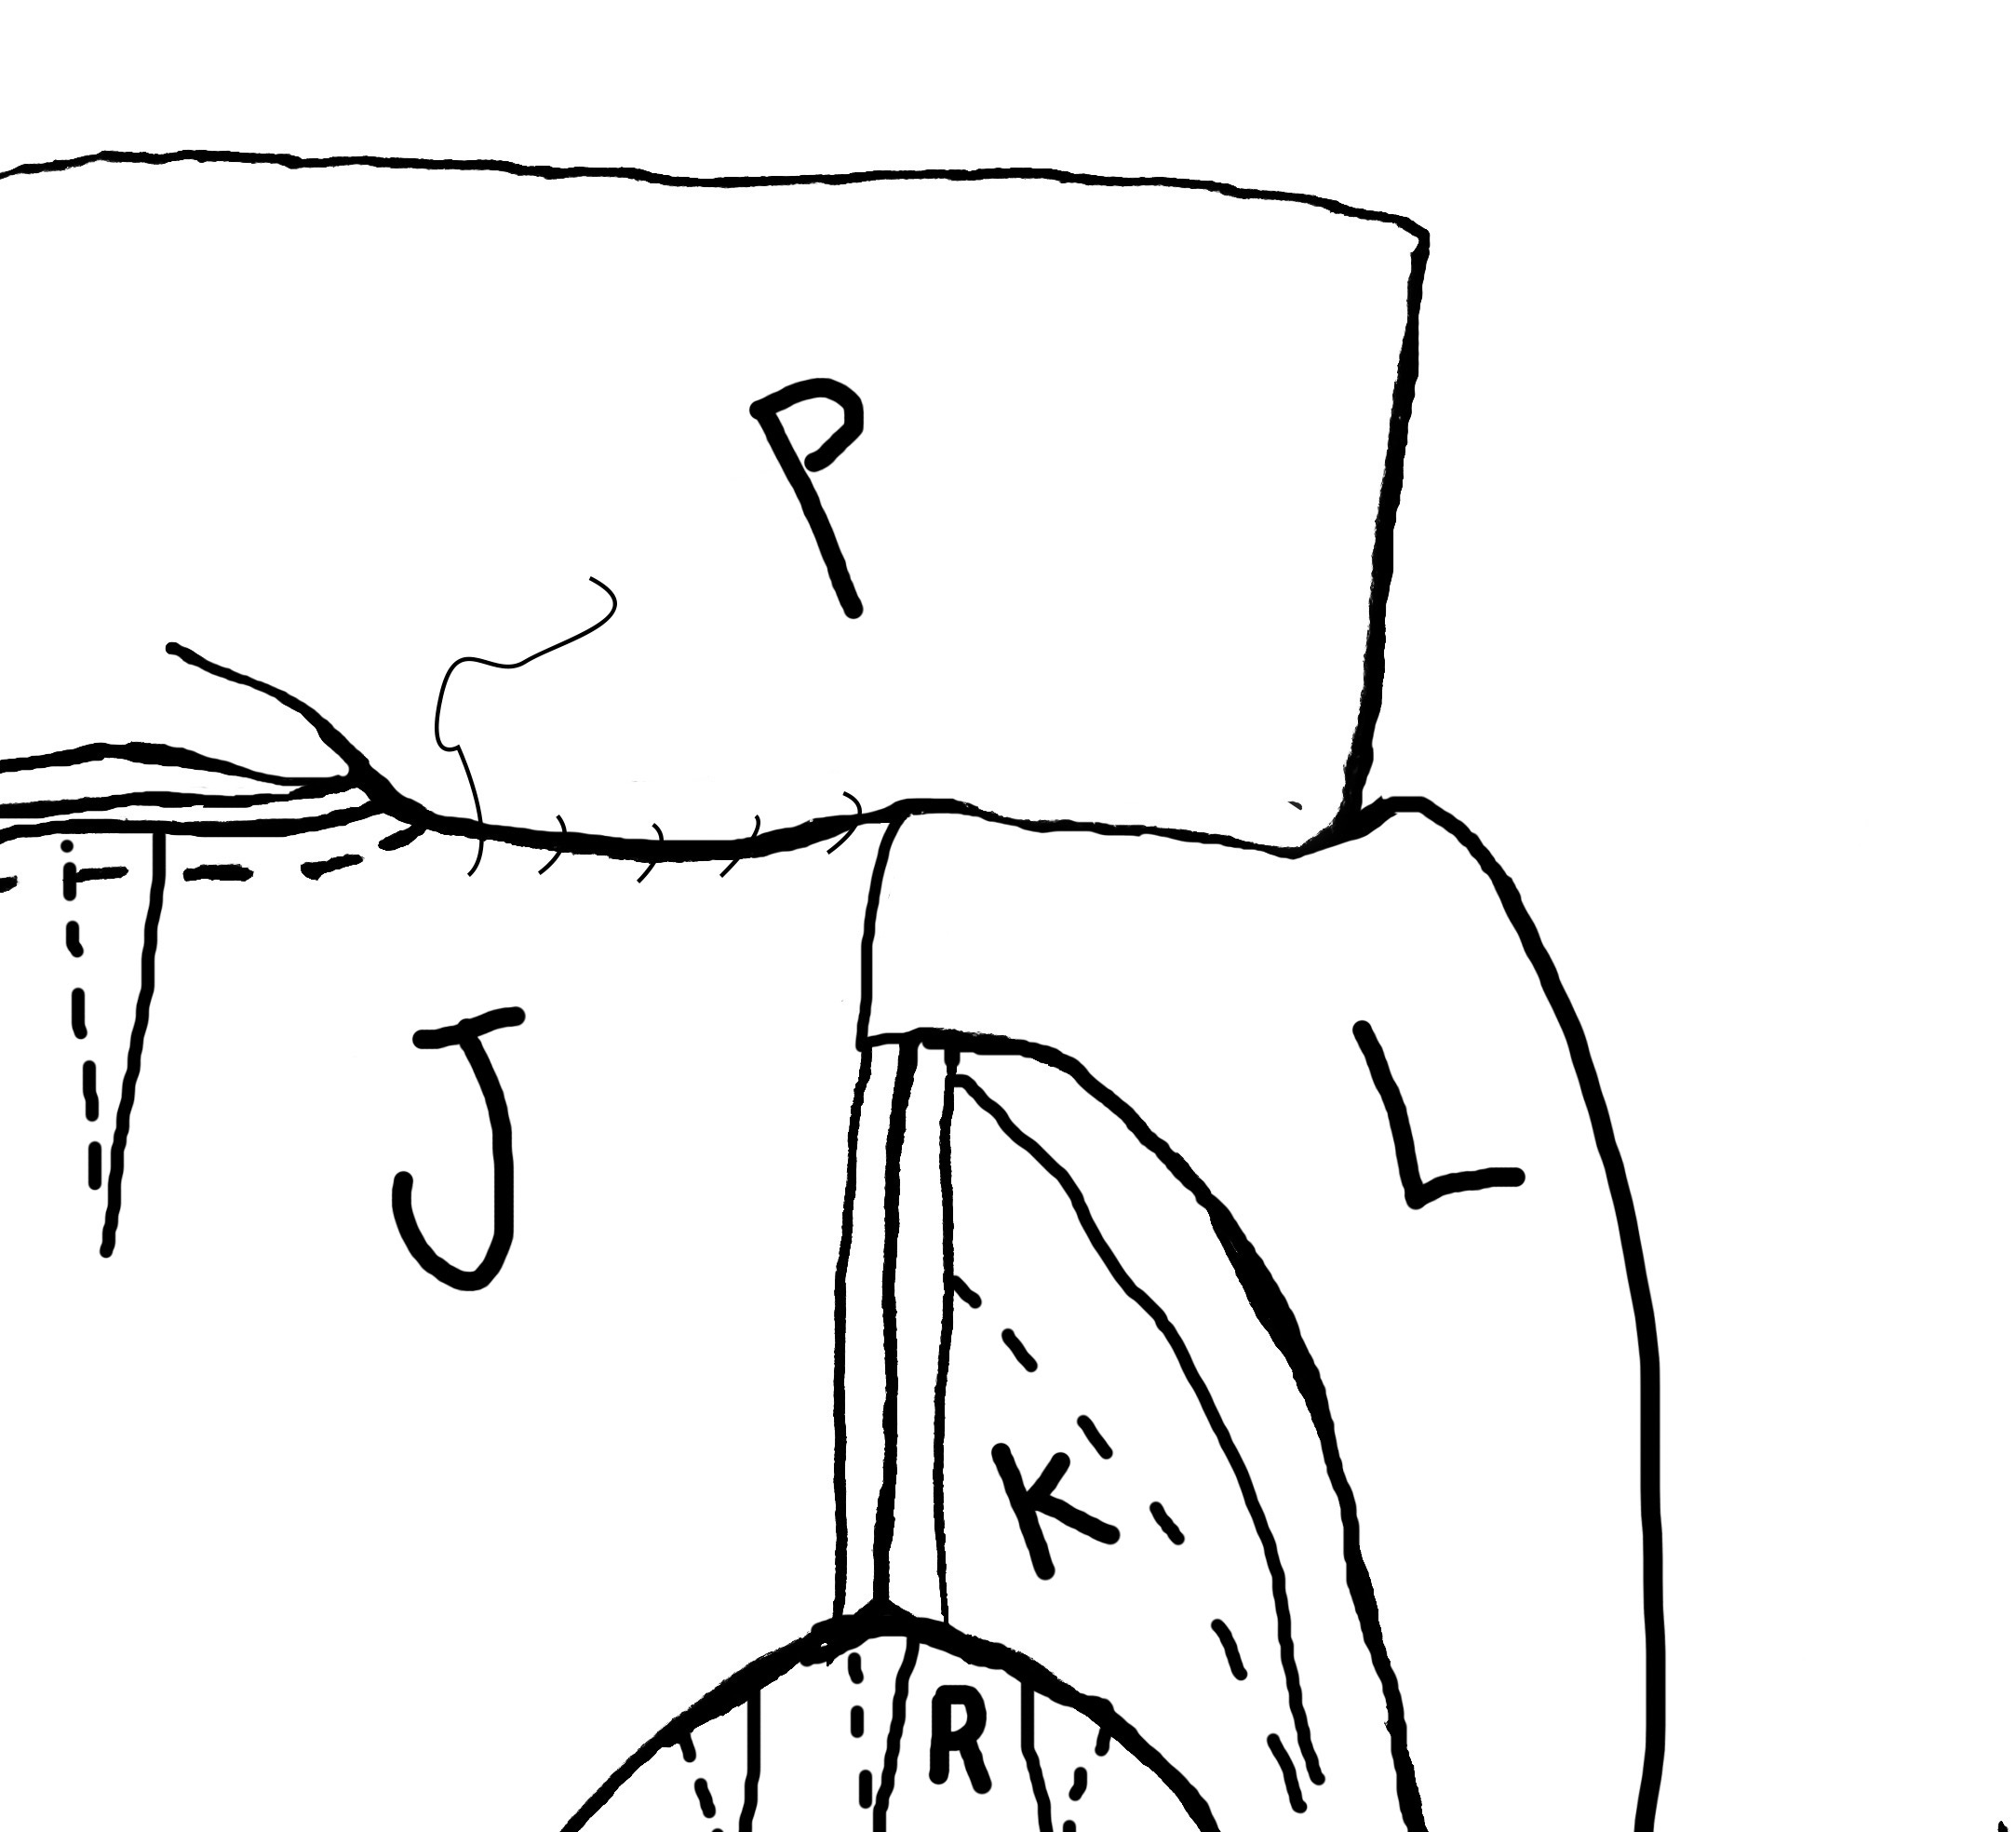
Probably the most egregious omission I see on vintage patterns is in the case of the collar. Anytime a garment has a collar with a facing, the older instructions seem to consistently fail to tell the sewist how to properly attach the collar. It’s usually not much better than just “Sew on the collar,” without even addressing the fact that the facing kind of, uh, gets completely in the way. If you don’t know what you’re supposed to do with the facing, you might get pretty lost.
Typically, you sew the collar underneath the facing, which is a little bit tricky. It requires a lot of pins, and a lot of stretching of curved edges/wrestling with collar ease, and it requires sewing through a lot of layers (usually four layers, to be exact.)
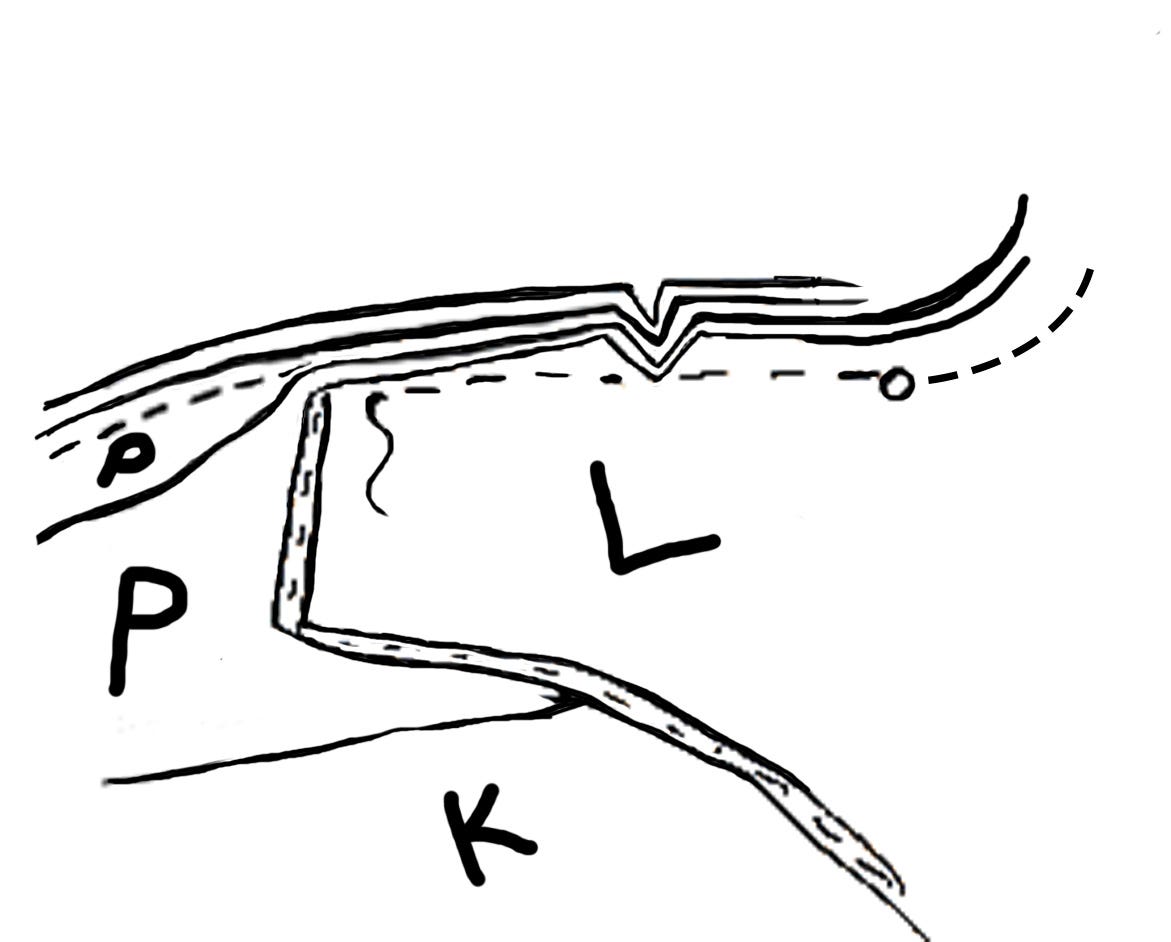
After you have sewn the edge of the collar through the facing, you’ve got to sew ONE remaining layer of the collar (the “collar facing, or the underside) to the rest of the neckline on the OUTSIDE, then clip the seam allowance at the shoulder, turn and press the edge of the OTHER layer of the collar, then pin it over the seam, and then fell stitch it to the INSIDE of the neckline.
(Sorry for my incredible sewing nerdery. That was probably pretty boring, even to sewing nerds!)
Well, the last three patterns I have worked with completely ignored the tricky part of attaching the collar/facing, so in all three cases, I’ve taken it upon myself to illustrate how to attach the damn thing. My illustrations are pretty “meh,” but I think they do the job.
Two of the patterns in question were Hollywood patterns, (including the one I’m working on right now — that will be my next post, if I get around to it)—and the other one was a Butterick pattern; that is, the wrap blouse from 1923.
Thankfully, it seems that pattern manufacturers more-or-less resolved this “how to even sew a collar” omission by the mid-50s, or at least—it’s explained a lot better in my “Cabana Shirt” pattern instructions, which is from 1957.
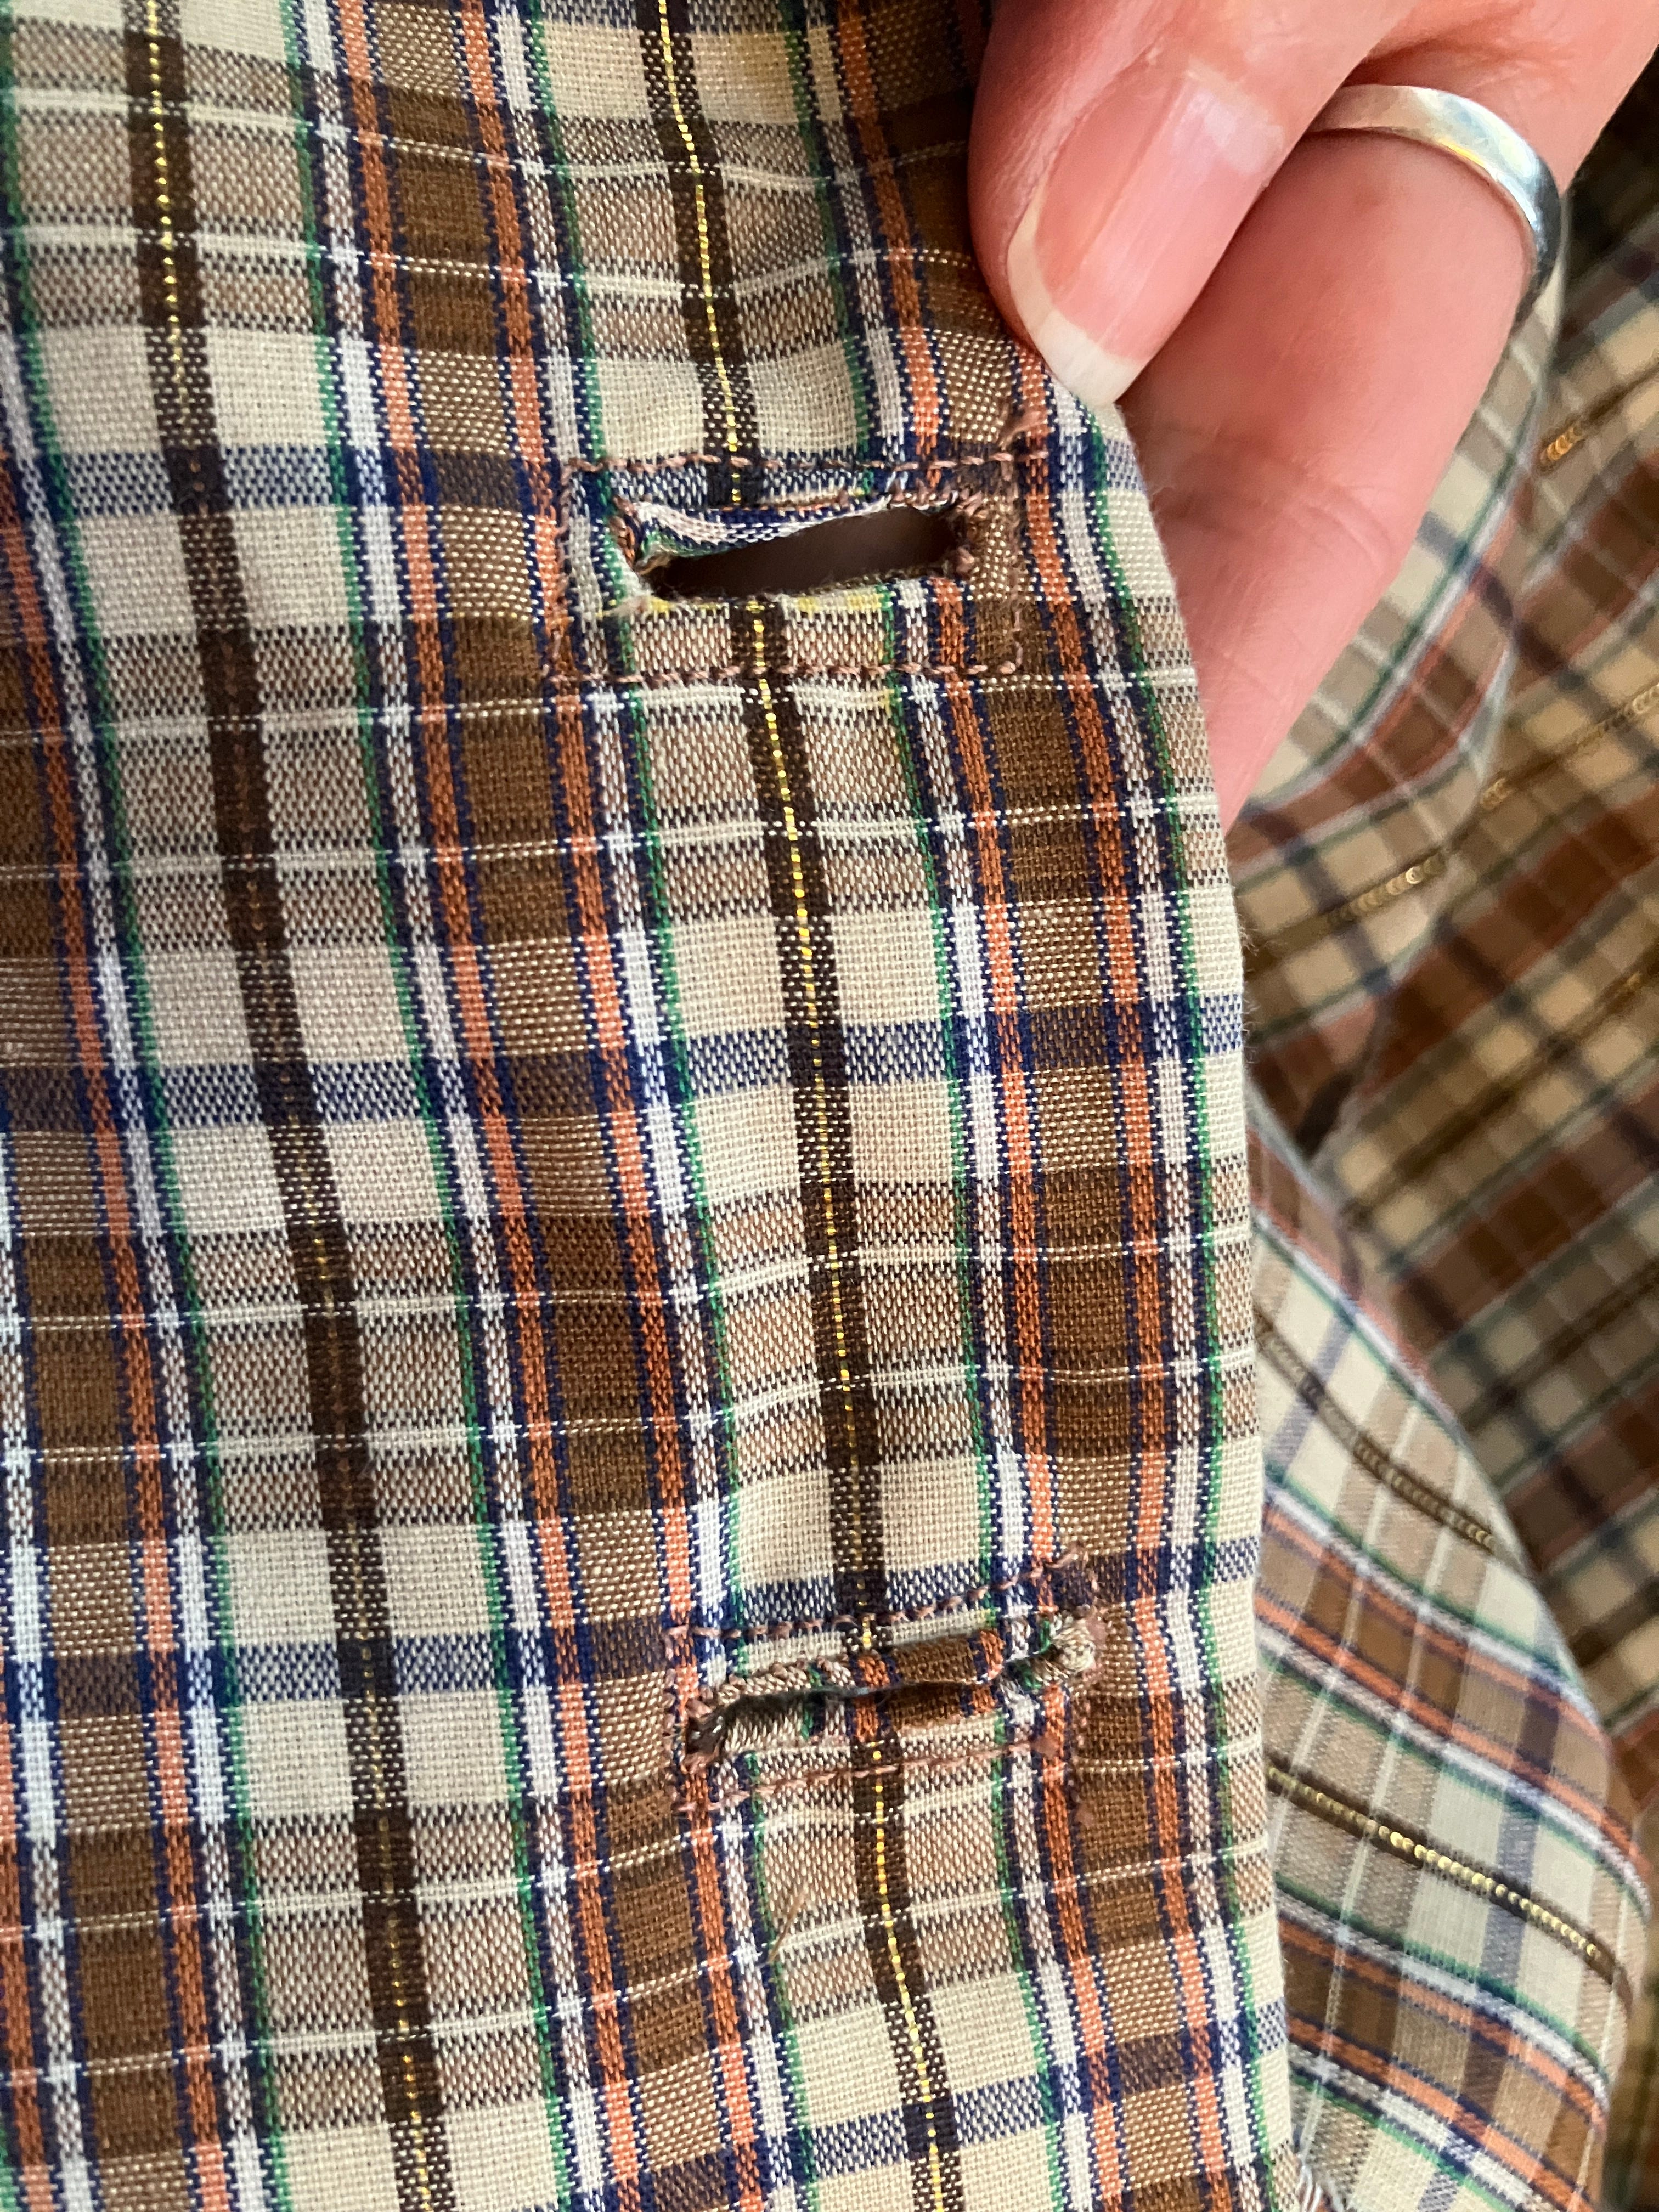
Despite the collar weirdness, I think the only real “problem” I had with the hooded dress was that the pockets wound up being off-center for me. This was mostly because I moved the buttonhole placement a little bit. The buttonholes seemed to be set really far into the placket, so I shifted them closer to the edge. This might have been fine, but then I sewed all the buttons a little bit farther out than where they were marked. This was kinda necessary in order for the dress to fit me properly, because I’m sort of between sizes. Sometimes I alter patterns better to fit me, but I usually don’t when I’m sewing a “test,” because my primary objective is to make sure all the notches and markings on my sized version are going to match up properly. Customizing and tailoring the pattern would tweak all those things.
Because it is a button front dress, one half of the dress naturally folds over the other half, and thus, even though the pockets are centered, if you mess around with the button/buttonhole placement at all, then the pockets aren’t gonna be centered. This is one of those things that not everyone would notice, but if you are the one who made the garment, then….YOU WILL NOTICE.
Actually, looking at the photo…ahem, they are pretty bad in this case. I think I’m probably not the only one who will notice!
Well, additionally, whenever I size a pattern up or down, I wonder whether I should shift the pockets out or in. This same consideration happened with my Cabana Shirt pattern, and in that case, I did shift them as I sized the pattern. I didn’t do that in this case. The pockets on this pattern seem like they are very close to the placket, but that’s probably just a matter of preference.
Anyway, here I am with my very asymmetrical pockets:
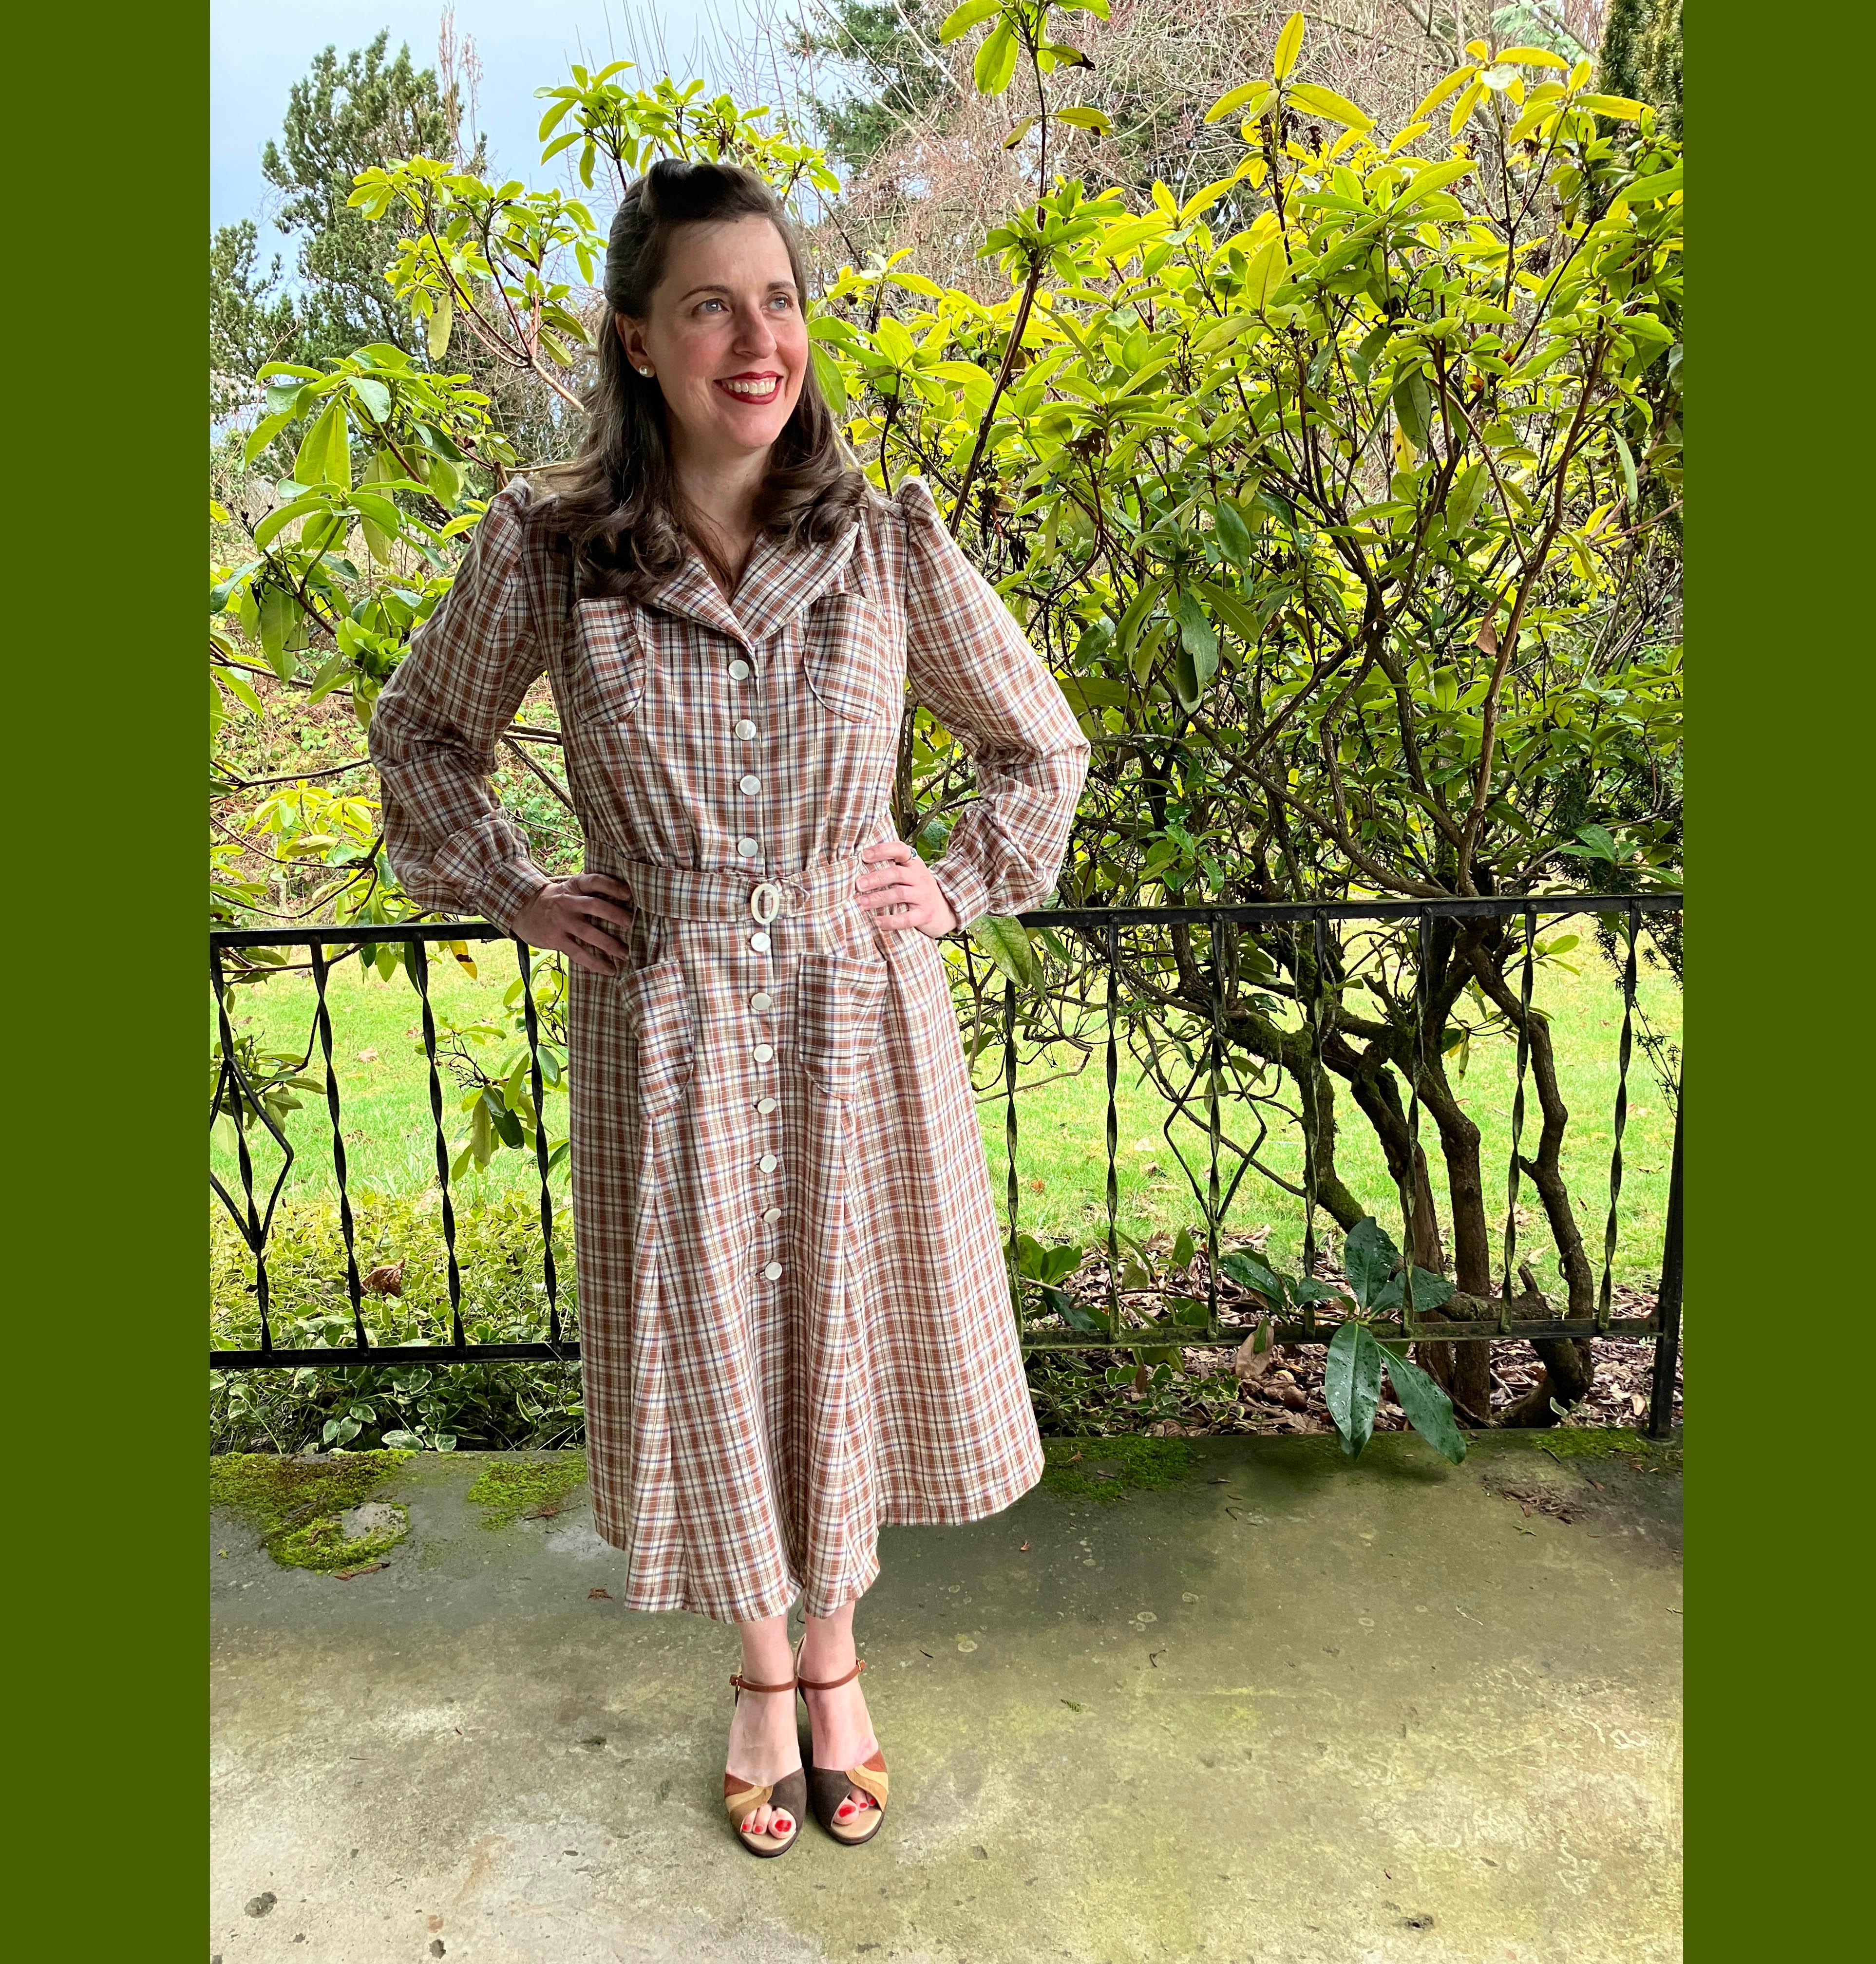
I think the dress is really cute anyway!
One of the reasons I fussed around with the buttonholes so much is because this was my very first attempt at making bound buttonholes. This was sort of a half-success. That is to say, I did about half of the buttonholes as bound buttonholes, then I gave up and did the rest of them with my machine buttonhole setting.
I messed up one of the bound buttonholes pretty badly. This was the first one I did:
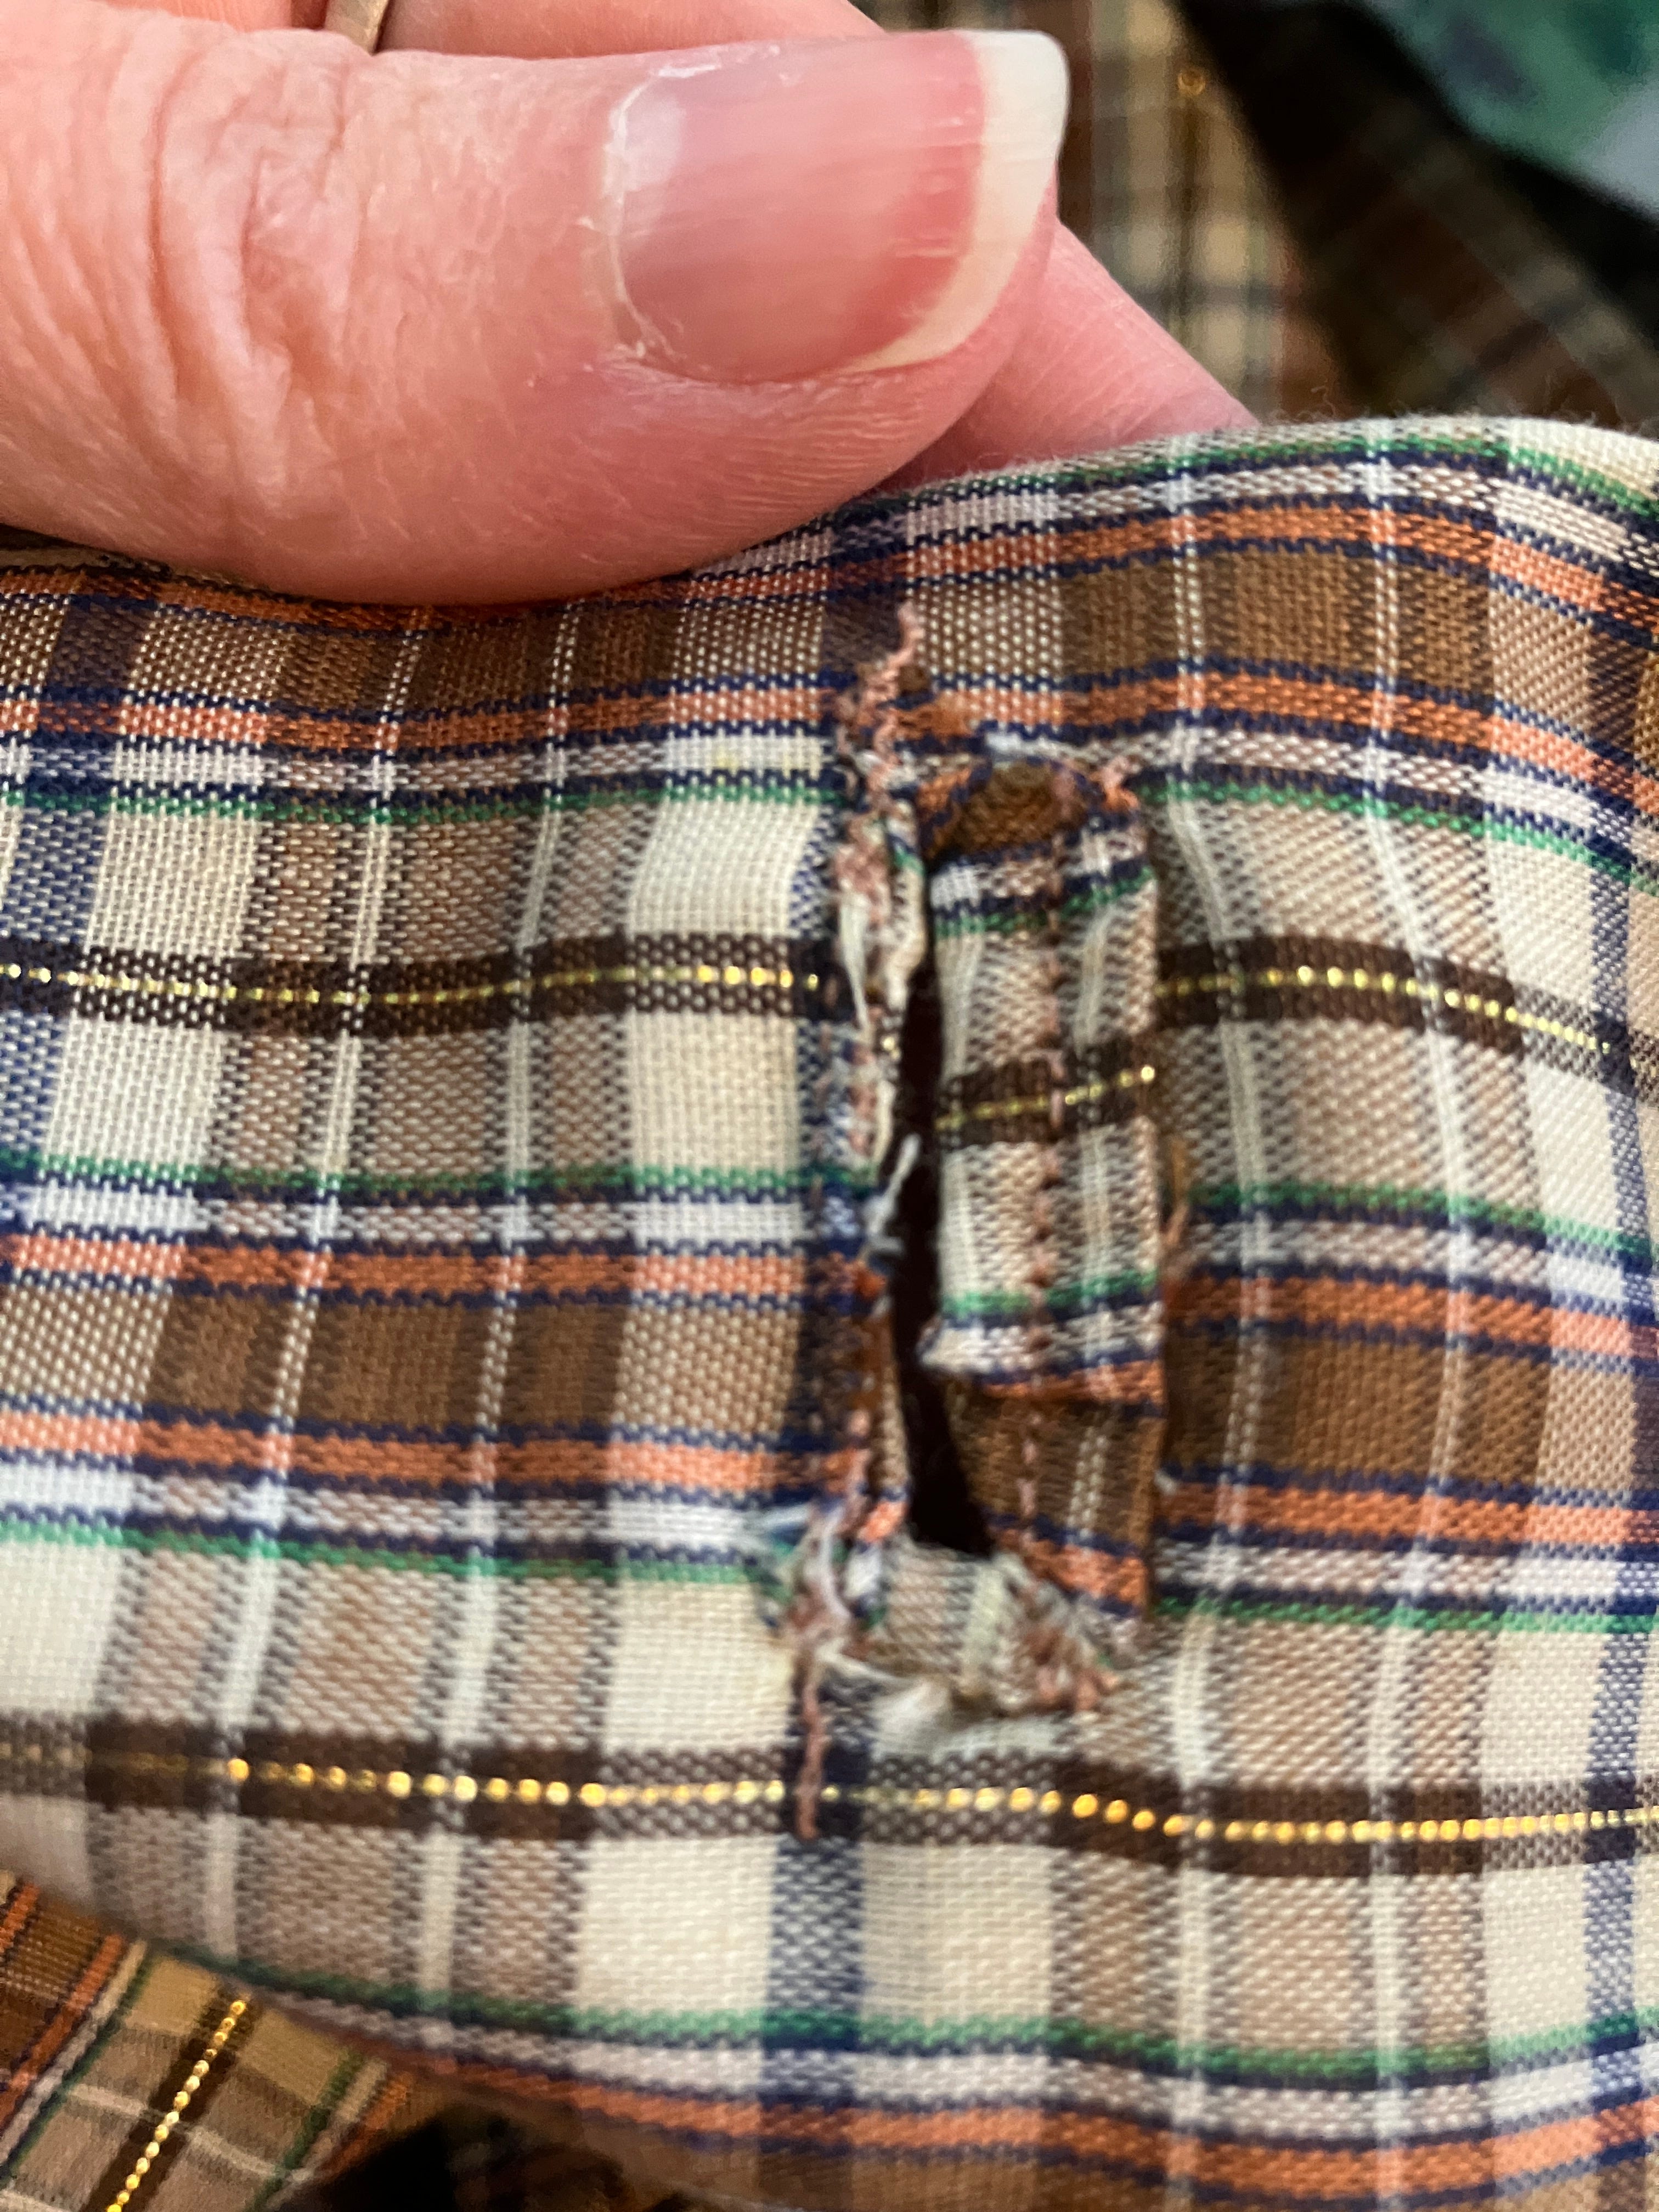
But I stuck with it for a few more buttonholes, and they went fairly smoothly after that one. It was time-consuming, though, which is why I only did bound buttonholes on the skirt portion; I made machine buttonholes on the bodice. I can absolutely see the benefit of doing it this way for a heavy coat—they look really nice (if you do them right!) but I think mostly I’ll just stick to machine-made buttonholes.
Bound buttonhole disasters and asymmetrical pockets aside, Here I am in the hooded version of the dress. I used ribbed chenille to line the hood and the revers:
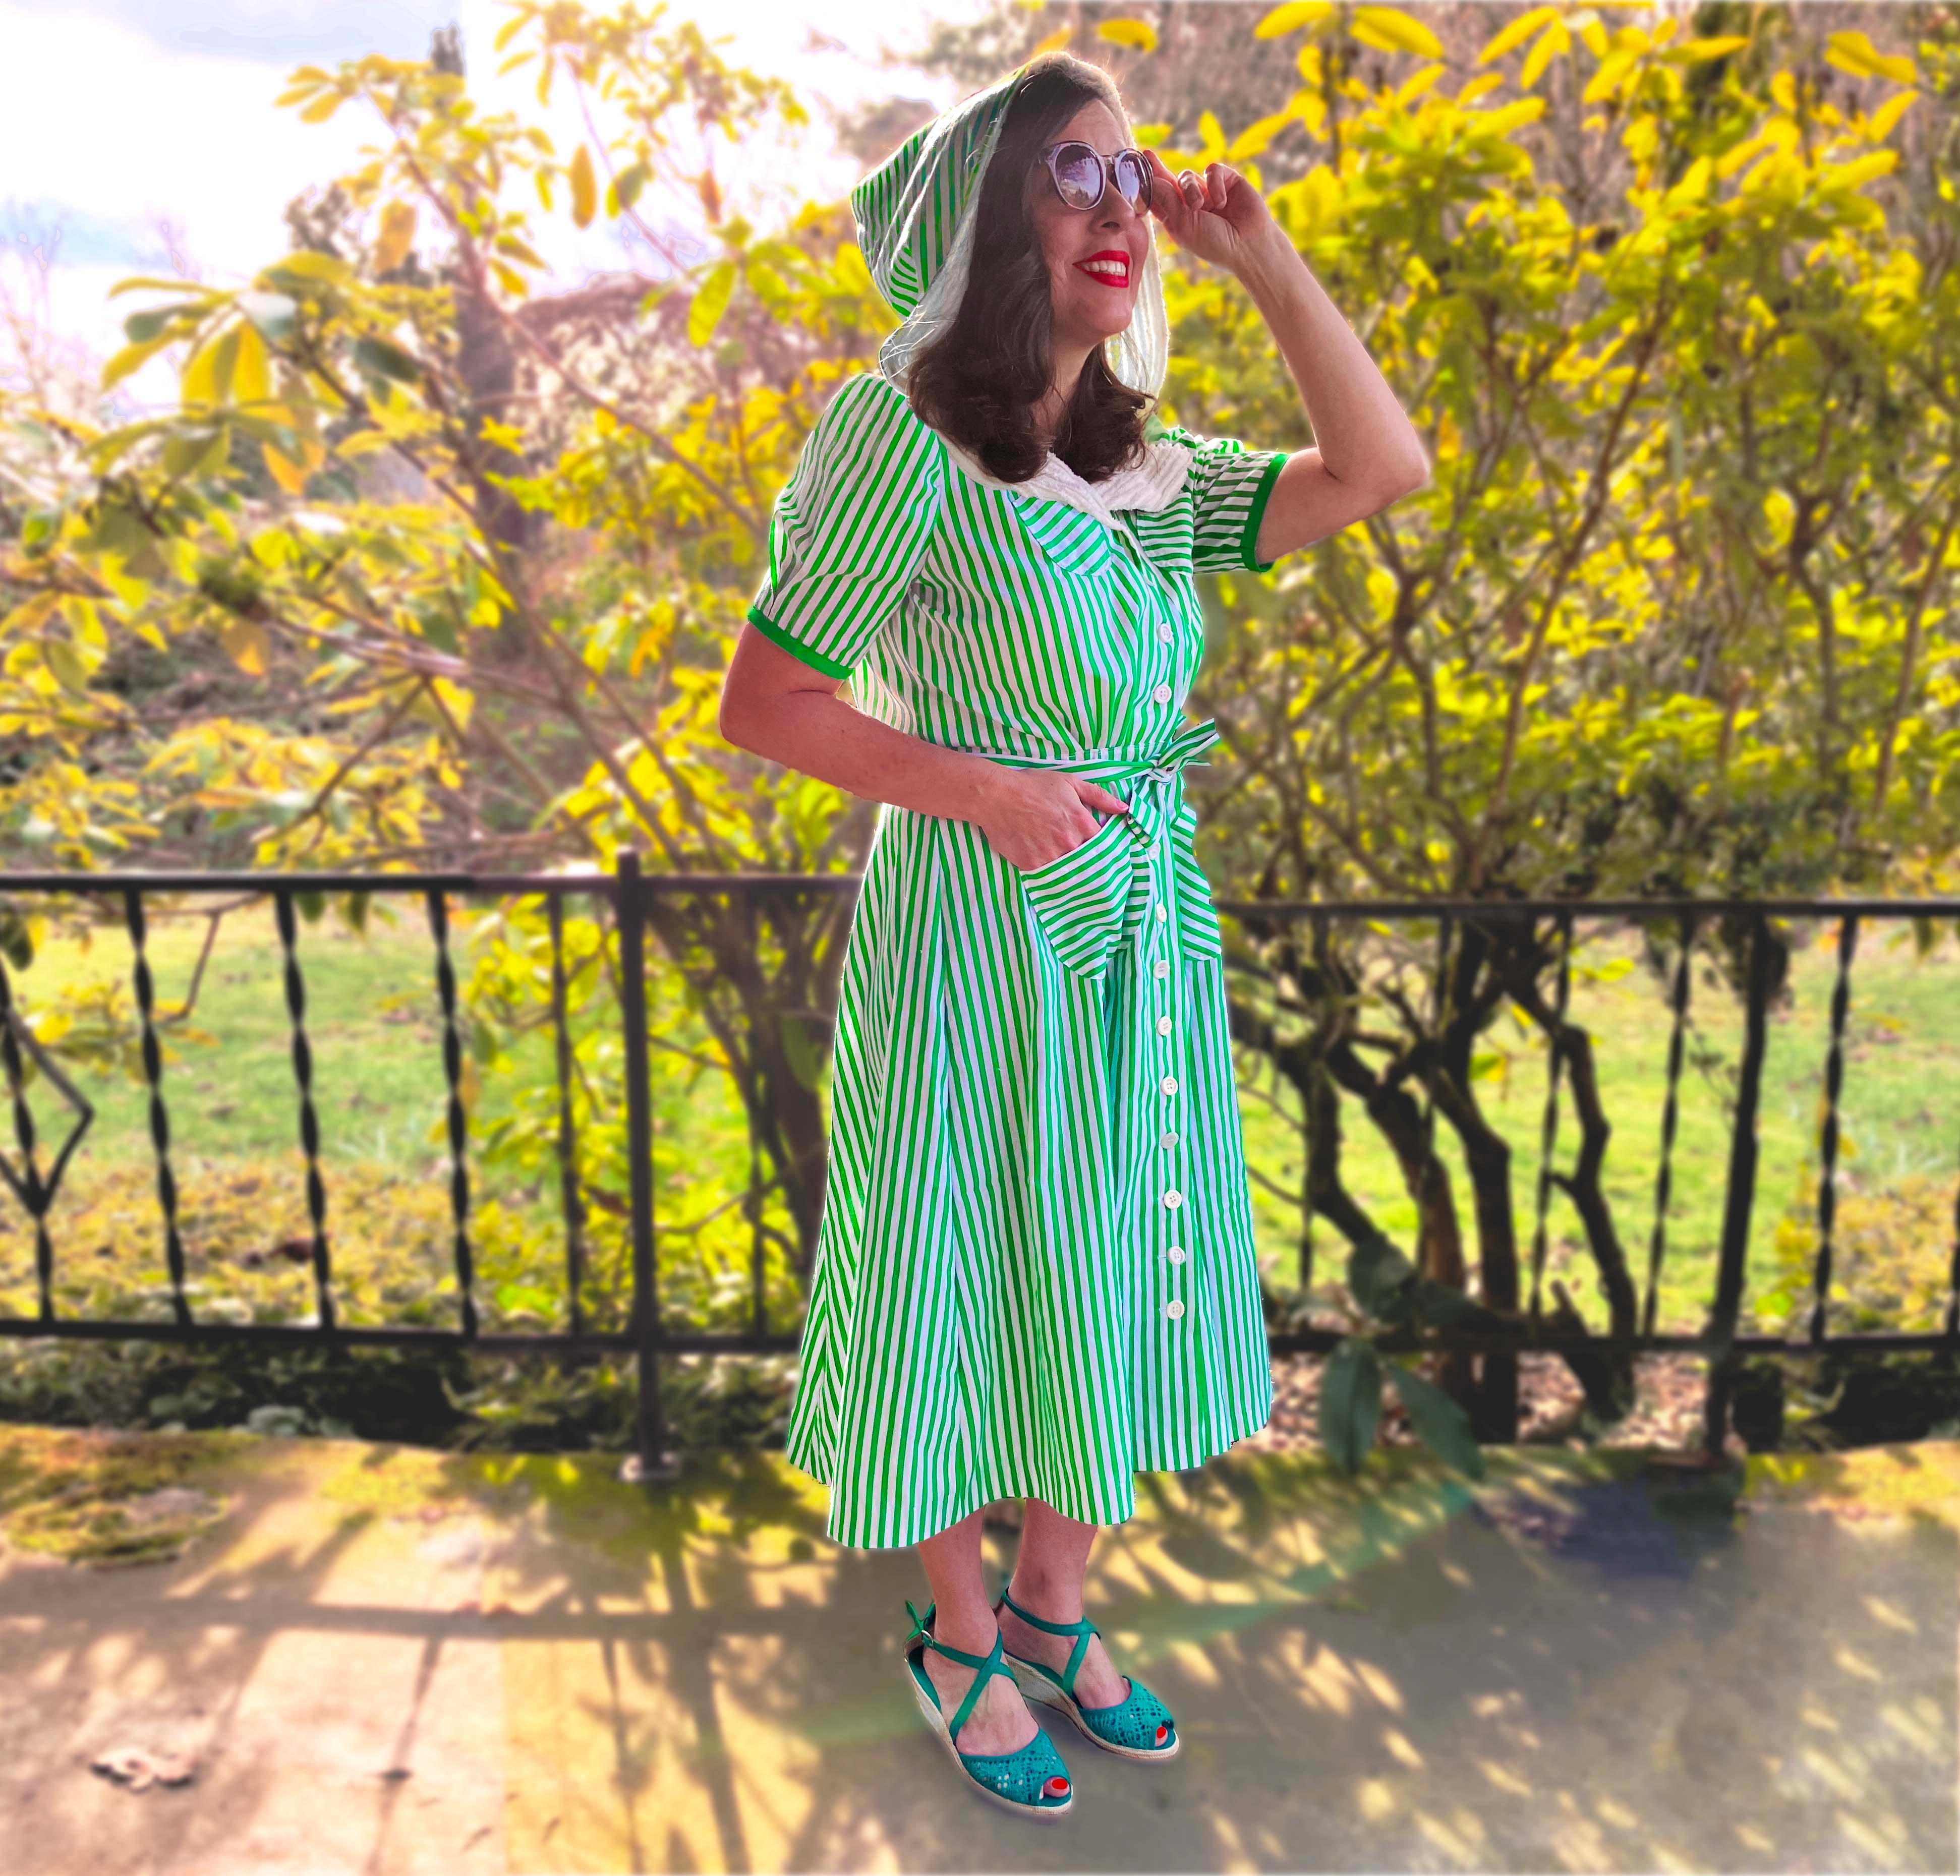
I feel slightly corny “posing” for the photos, but admittedly I also think it’s pretty fun. Some of us just need an excuse to put on a bunch of makeup and do our hair every once in awhile, eh?
Additionally, I can’t actually walk in shoes with any kind of a heel on them anymore—not even these little wedges—ever since I busted my foot in a car accident a few years ago. I like having a reason to put on cute vintage shoes every once in a while, even if it’s just to hobble out on the porch and snap a few photos. (And yes, these photos are pretty ‘shopped, if just to photoshop out the creepy foot/ankle scars from two surgeries! Oh yeah and I also photoshopped on my toenail polish in both pictures, since I realized after-the-fact that my toes looked pretty drab and needed some livening up!)